Traverse Global v11.2 - Service Repair
Receive Orders
Use the Receiving Orders function to receive items on purchase orders ('New' order type), sales order RMAs, PC material returns, SD part returns, WM material requisition returns, and WM transfers (to Location). As each line is entered or scanned, inventory is saved to your inventory counts in real time and is available to use. This function is equivalent to the Traverse WM Receive function. See the Receive function topic for details on the receive process and how it relates to the putaway process.
To receive an item from an order transaction:
- Scan or select the order number in the Order No field. Orders that are fully received will not appear in the list. The List tab will open. You can filter the orders listed in the Order No: field by using the Filter Orders panel.
 Filter Orders
Use the arrow to expand or collapse the Filter Orders panel.
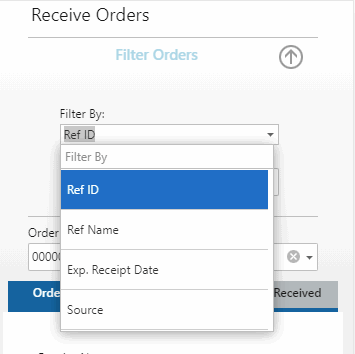
In the Filter By: drop-down list, select a filter option.
In the Filter Value: field, enter or select a filter value.
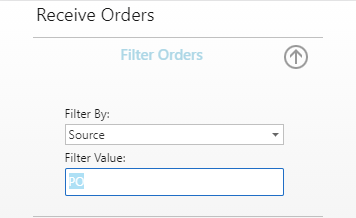
When you tab out of the Filter Value field and view the drop-down list in the Order No: field, the list will show only the open orders that meet the filter criteria.
-
 On the Order tab
If you need to enter Shipper No.or Notes information, go to the Order tab and enter that information in the appropriate field. The PO Receipt will be updated with this information when the receipt is confirmed.

If necessary, use the Clear button to clear the screen. Use it again to clear the header.
-
 On the List tab
To receive all items at once, use the Receive All button, after which the Received tab will open. Alternately, to receive each line item in turn, select the line item you want to receive.

- When you select a line item, the Detail tab will open.
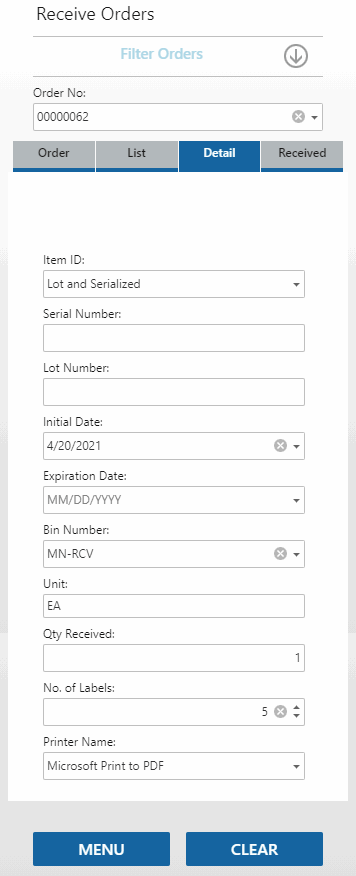
- If the item being received is lotted, serialized, or both, the Lot/Serial Number Information section will automatically expand. Scan or enter the Lot Number, Serial Number, and Expiration Date of the item you are receiving, as applicable. Accept or enter an Initial Date, as applicable. Serialized assemblies will require a separate entry for each serial number with a Received Qty of one.
Note: Data validation is applied to the fields in the Detail tab. The order of the data validation process depends on the setting of the Use Container parameter. When Use Container is set to Yes, the validation process occurs in the following sequence: Container, Bin Number, Lot Number, Expiration Date, and Serial Number. On the other hand, if Use Container is set to No, the validation process occurs in the following sequence: Bin Number, Lot Number, Expiration Date, and Serial Number.
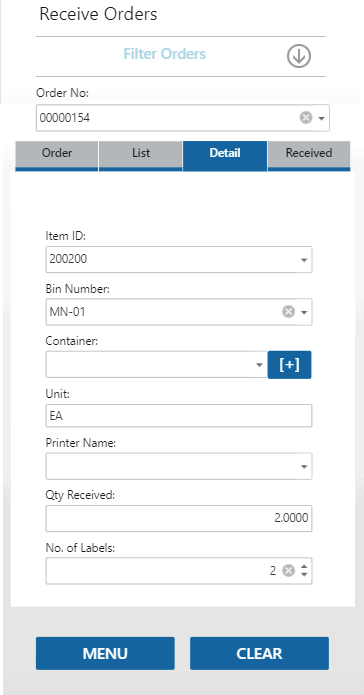
- Scan or enter the Container, as applicable. If the WM Containers Auto Create business rule is set to 'Yes', you can use the Add button to create a new container. If the business rule is set to 'No', the Add button will not display. If the WM Use Containers business rule is set to 'No', the field will not appear.
- Accept or scan/enter the Bin Number. If you are receiving items from a purchase order, the bin number from the line item on the PO will default into the Bin Number field. If you are receiving items from any other source, the item/location default bin will populate the field, if available. If the item/location has no default bin, the location default bin will be used. You can select a different bin from the drop-down list. If you use a two-step process (receive items into a receiving bin and then put items away into stock), accept or select a receiving bin.
If the Default Bin on Receiving WM business rule is set to 'No', the default Bin Number will be blank.
If you use a single-step receiving process (receive items directly into stock), you can scan or select the stocking bin here.
- The Unit of measure for the item is displayed.
- Select a label printer from the Printer Name drop-down list. The available printers are those installed on the server that hosts Mobile WMS.
- Enter the quantity you are receiving in the Qty Received field. If the Default Quantity on Receiving WM business rule is set to 'No', the default Qty Received will be set to zero.
- Enter the quantity of labels you want to print in the No. of Labels field.
- Accept or select a Printer Name to which you want to print the labels.
- Repeat steps a through i for each item you are receiving into inventory. You can view the items you have received on the Received tab. Items will not be received into inventory until you confirm the receipt.
If necessary, use the Clear button to clear the screen. Use it again to clear the header.
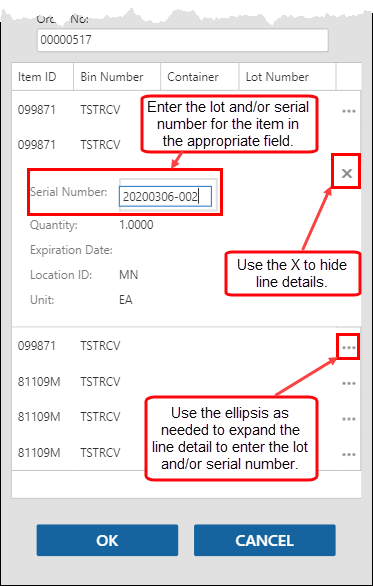
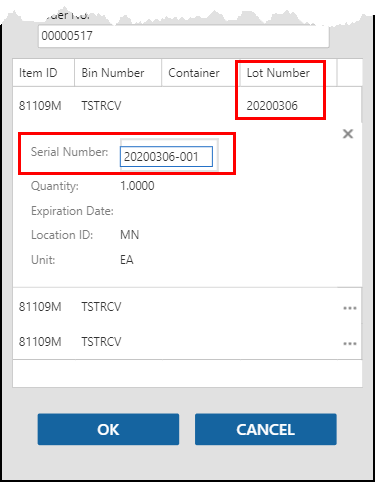
If you are receiving multiple serialized items or lotted and serialized items, and you use the Receive All button, you will be required to enter serial and/or lot numbers for each item. Expand each line and enter the required information.
 WWWWW
WWWWW
- When you select a line item, the Detail tab will open.
-
 On the Received tab
The Received tab lists the items that have been received. Scroll to see all lines as necessary.
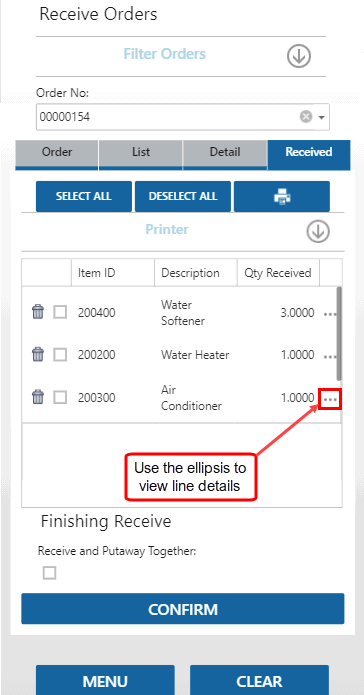

- On the Received tab, items you have received in the current session are indicated with a Delete icon in case you do not want to receive the item. The Receipt Number will be auto-generated with the <YearMonthDate> as the receipt number. The date will be the current workstation date. Tap the ellipsis to expand the details for the line. Tip: Scroll to the side or vertically if you can't see all the columns.
 WWWWW
WWWWW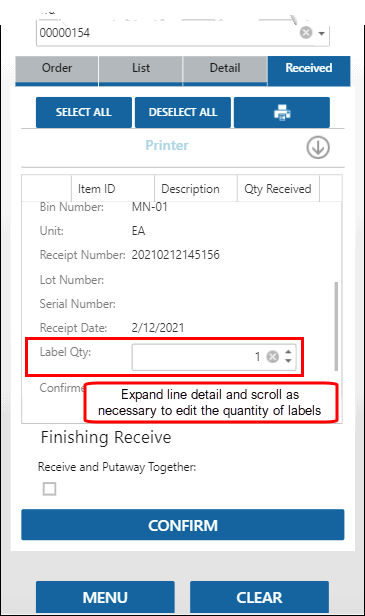
To remove items from the receipt, tap the Delete icon (Note: you cannot delete items that have already been confirmed).
For printing labels: Accept or edit the quantity of labels you want to print in the Label Qty field. The check boxes indicate which item labels will print. You can mark all check boxes by using the Select All button. Clear all check boxes using the Deselect All button.
The default label printer for the item will be used. If you want to change the label printer, expand the Printer section and select a different printer from the drop-down list. The available printers are those installed on the server that hosts Mobile WMS.
Note: Only installed or virtual printers will be available to select. Redirected printers, such as those that show in Windows when you use a Remote Desktop connection (RDP), will not be available. Likewise, you cannot select the Microsoft Print to PDF or Microsoft XPS Writer virtual printers.
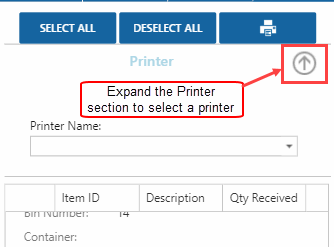
Use the Printer icon to preview, print, and/or download the labels.
- Use the Confirm button to confirm the receipt and proceed to the next order to receive, as needed. A green message at the top of the screen will indicate the process is completed. Shipment No is available in the Activity Log report, so that you can keep it as reference.
-
 Finishing Receive
If you mark the Receive and Putaway Together check box, the items you are receiving will be put directly into stock, in the bins specified on the Detail tab. If you clear the check box, the items you are receiving will be moved into a receiving bin (which may not be a receiving-type bin).
After the confirm process, if you left the Receive and Putaway Together check box blank, use the Put Away function to put the items into stocking bins.
When finished, select Menu to return to the Receiving menu.
